


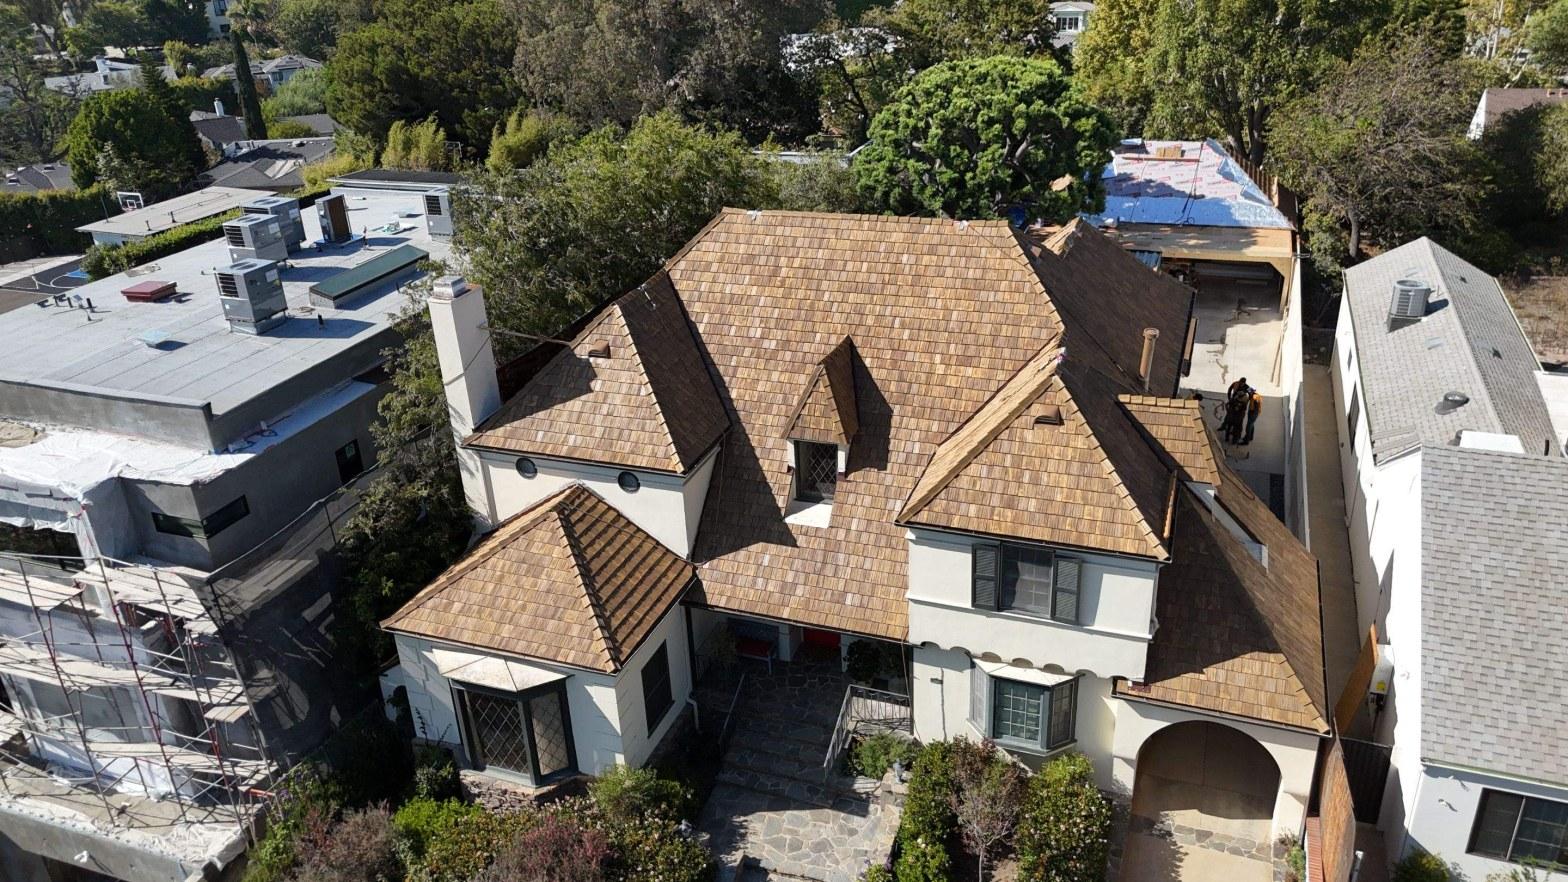
A large two-story stucco home in Cheviot Hills needed its end-of-life wood shake roof replaced across two completely different roof systems, steep multi-plane slopes and low-slope flat sections, all meeting along shared edges.
A Roof That Is Really Two Roofs
This Cheviot Hills home in West Los Angeles does not have one roofing problem. It has two, and they happen to share a building. The front and center of the house is a steep, multi-plane structure: hipped main slopes, two gabled dormers, a rounded turret corner, and two chimneys, all intersecting at a series of valleys and ridges. Travel toward the rear and the sides, and the geometry changes completely. The slopes flatten out into low-slope and effectively flat sections covering rear rooms and a deck area. Each zone demands a different waterproofing strategy. The place where those strategies meet, along the edges where steep meets flat, is where most of the technical complexity lives.
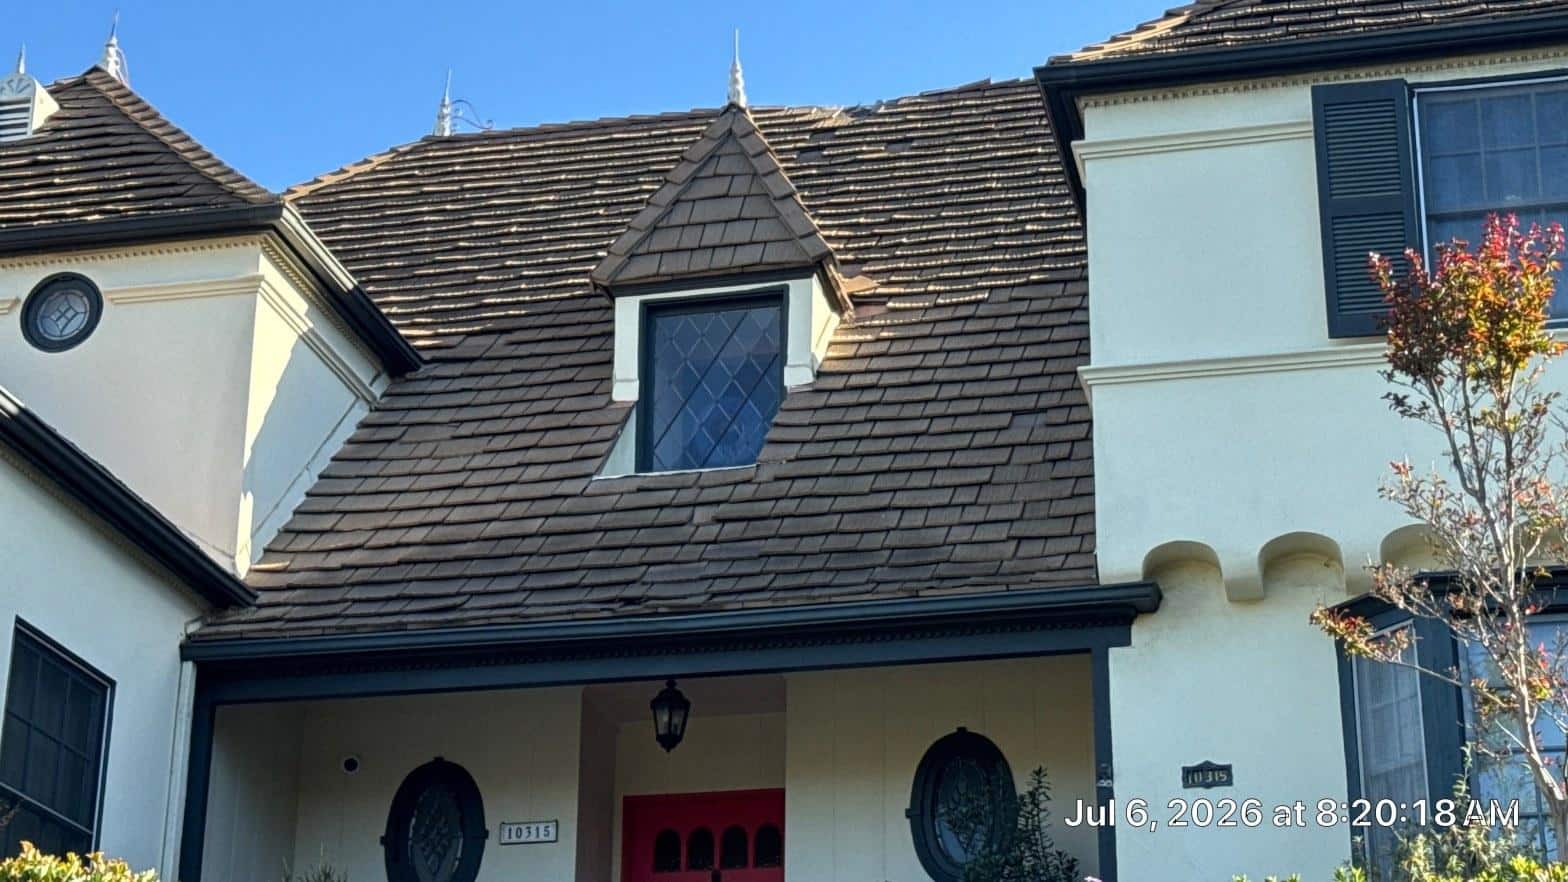
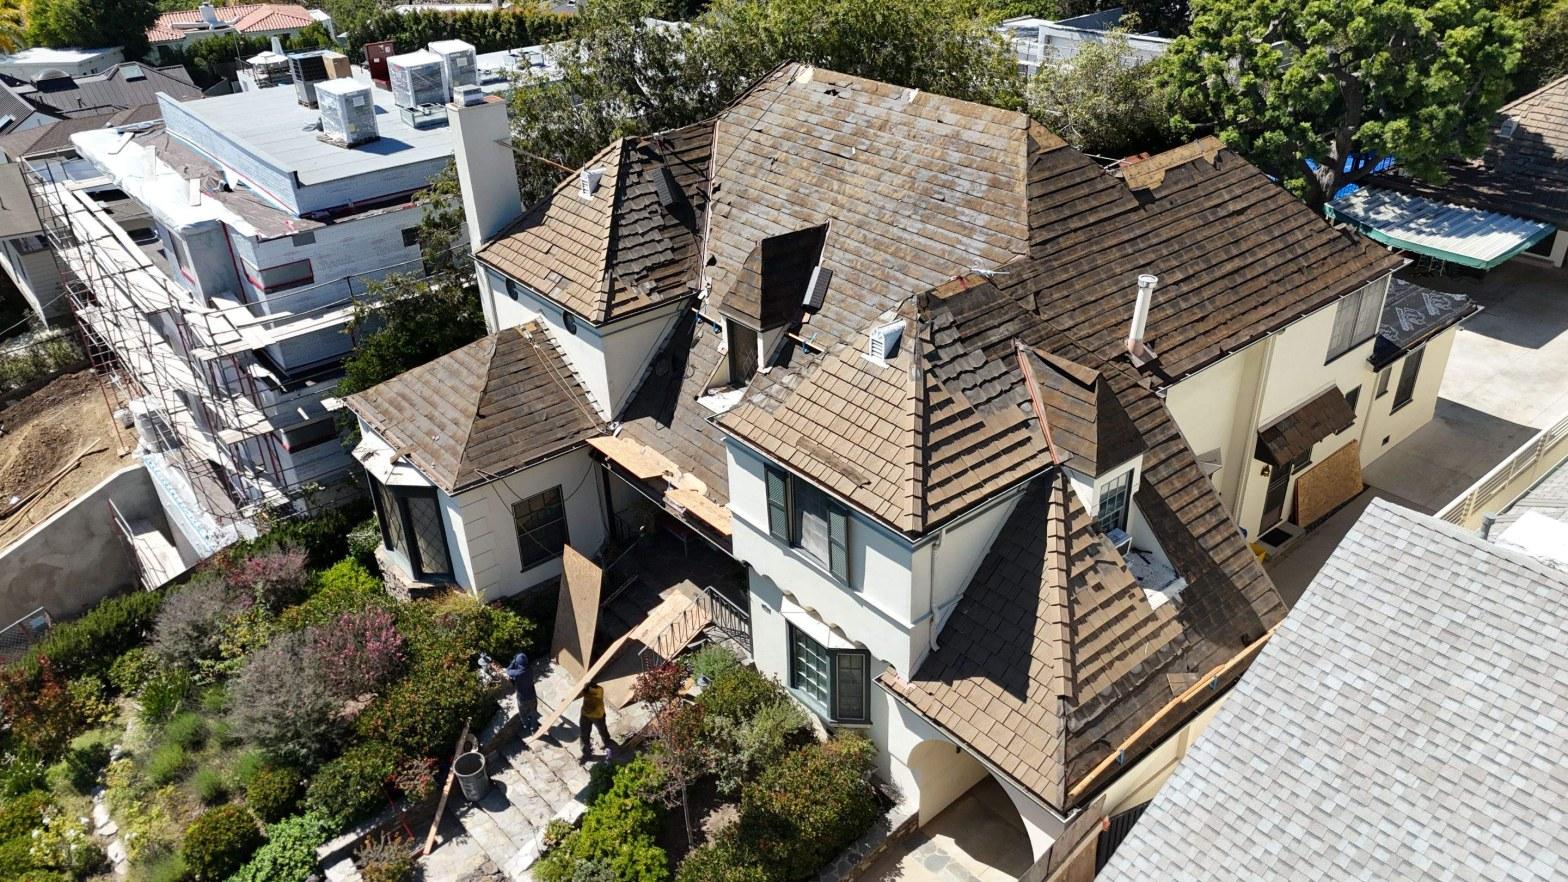
The original roof was wood shake throughout. On the steep slopes, shakes are a logical and time-honored choice; they shed water through gravity and airflow. On the low-slope sections, that same logic falls apart. A shake cannot do what a membrane does. So the original installation was always a hybrid, even if the homeowner never thought of it that way. By summer 2026, the shakes had weathered to a flat, grey finish, the kind of silver that tells you the material has reached the end of its serviceable life. The low-slope sections had their own concerns. Everything needed to come off.
What Does Reading the Structure Before Pricing the Work Actually Mean?
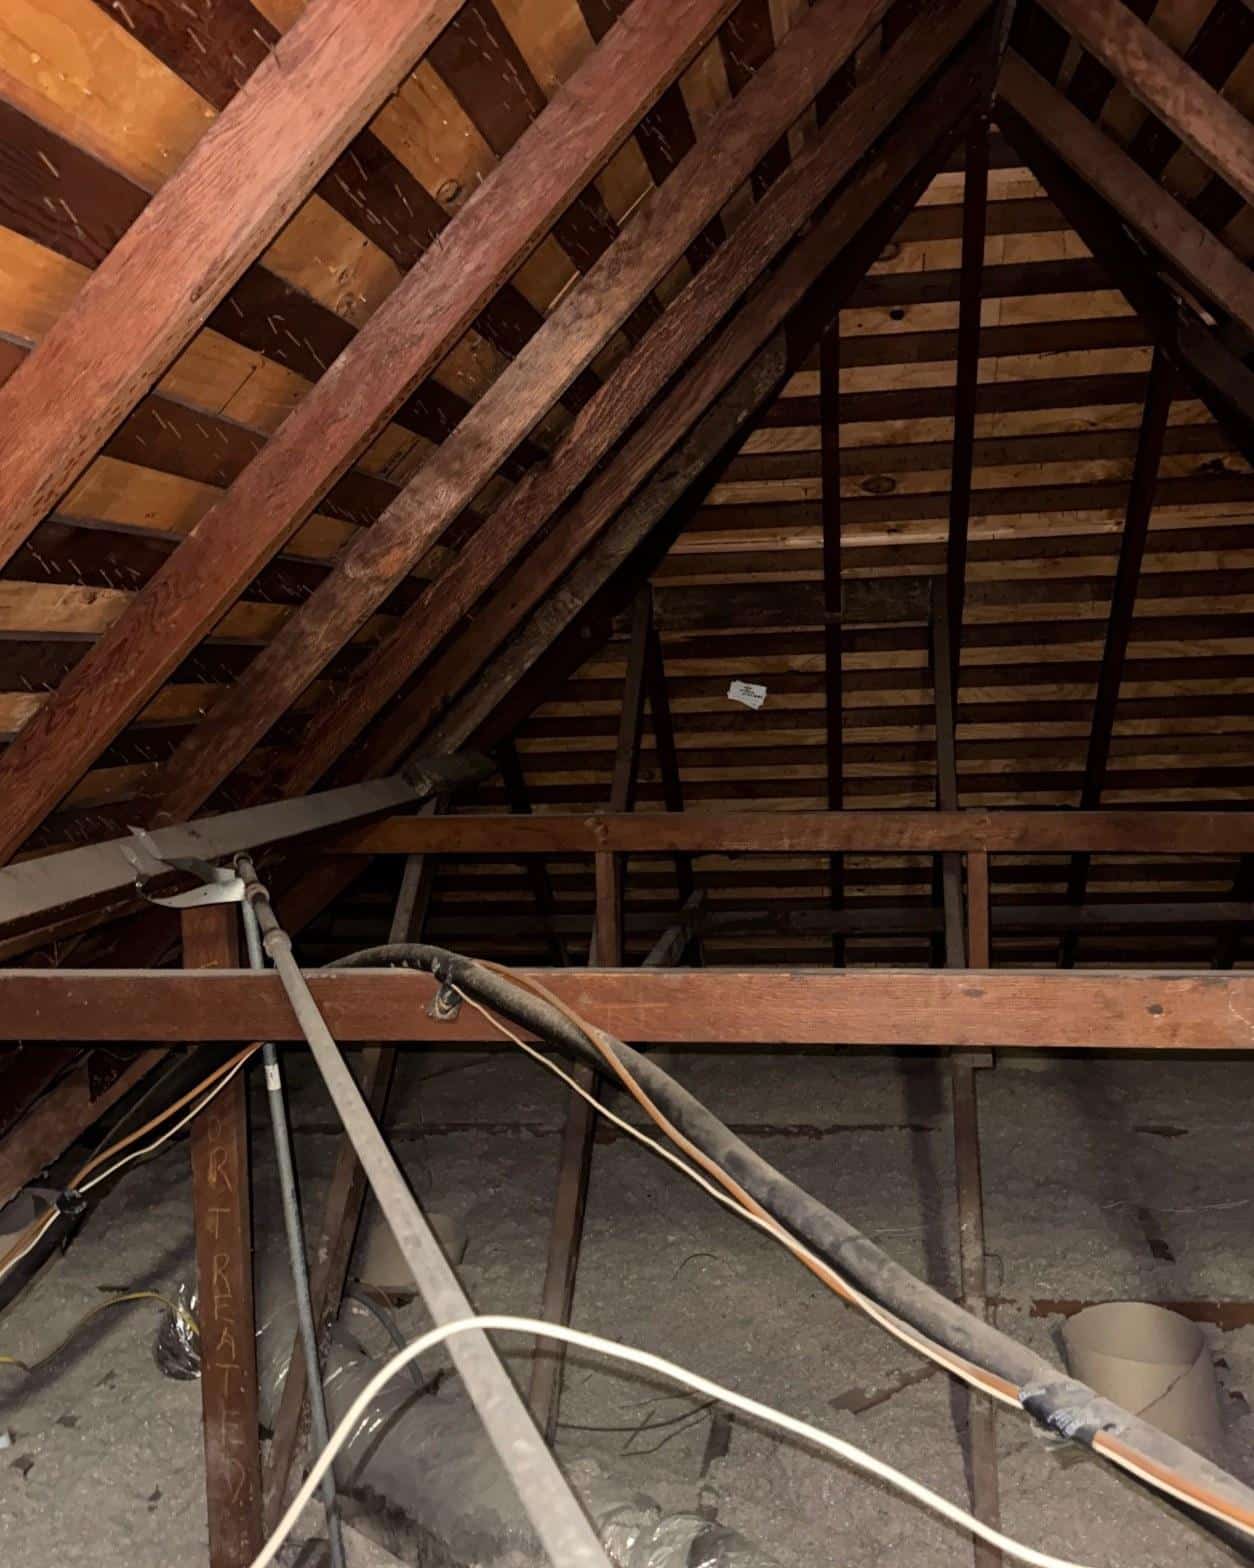
Before any tear-off begins on a roof like this one, the structure underneath needs to be understood from the inside, not just the outside. The pitch and the complexity of this roof mean that an attic inspection is not a formality; it is the step that determines whether the scope of work is what it appears to be from the street. Our team went in through the attic before the first shake was pulled, checking rafter bays, existing duct runs, and the condition of the existing sheathing from below.
What that inspection reveals shapes the whole estimate. Rafter tails that look sound from the eave can be soft at the bird’s mouth. Purlins that carry the shake battens can have decades of moisture cycling through them from condensation, long before any exterior leak is obvious. An existing HVAC duct running through a rafter bay, as visible in the attic photos from this job, also has to be worked around carefully during tear-off so the crew does not compromise the mechanical system while removing sheathing above it.
This is also where California’s Title 24 building energy standards become relevant for any work touching the thermal envelope. California’s Title 24 energy code has governed roof assembly requirements since well before the 2024 update cycle, and any re-roof permit in Los Angeles must account for those provisions. The attic inspection is the moment to identify whether the existing insulation and ventilation meet current requirements, or whether the permit scope will need to address them.
The Deck Decides Everything That Follows
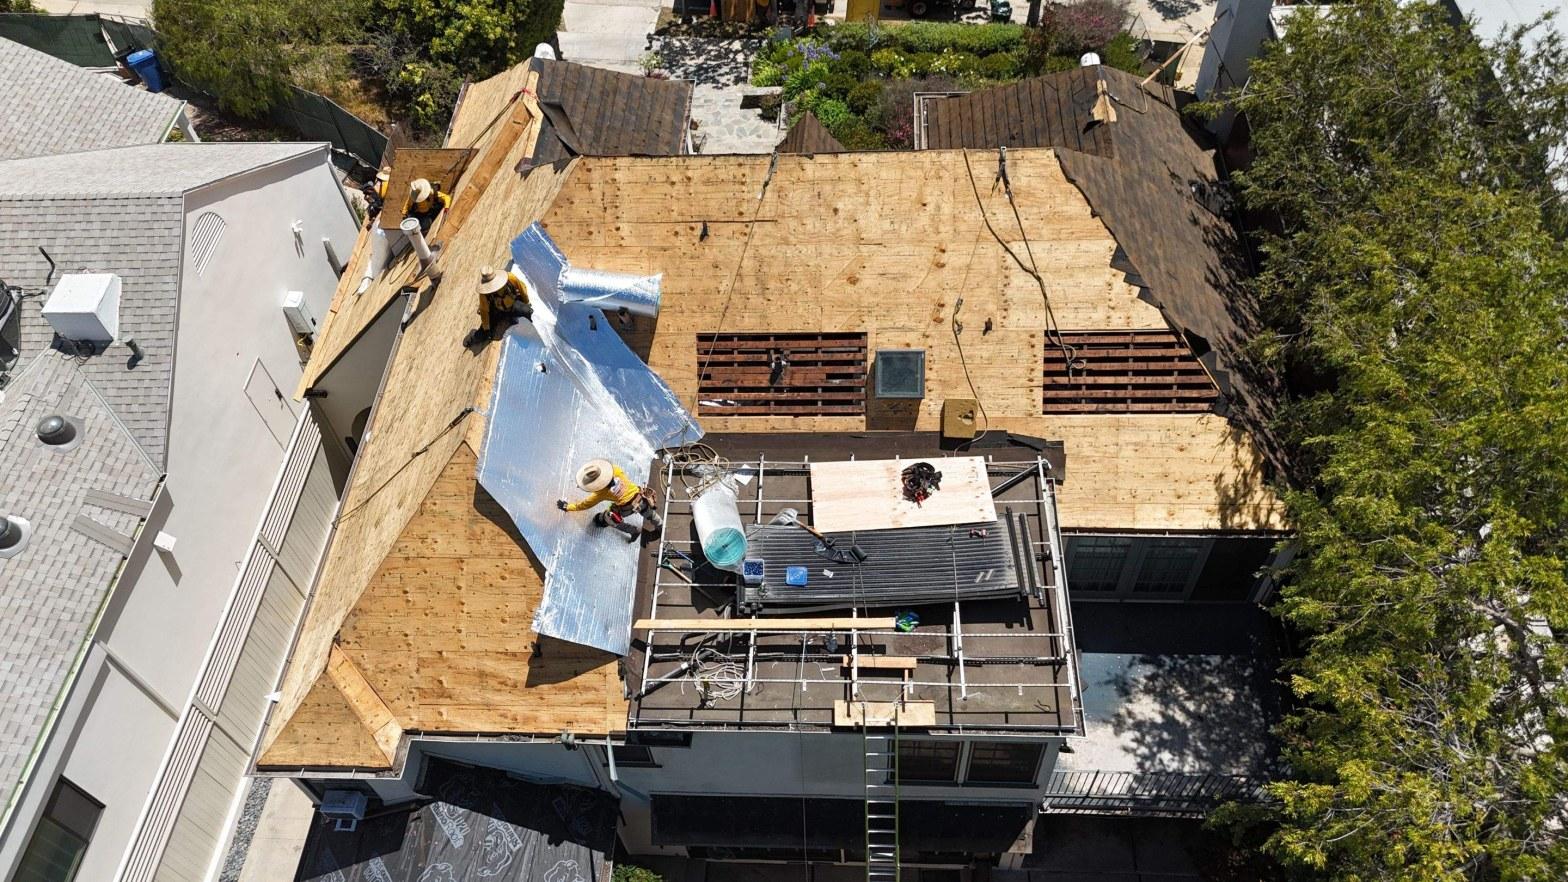
The condition of the roof deck is the single variable that most changes the cost and schedule of a re-roof, because it cannot be fully assessed until the old material is off. On this job, the steep-slope sections retained enough structural sheathing to work from after the tear-off, but the low-slope sections required new plywood decking across those areas before any waterproofing could go down. That is a normal finding on a roof of this age and configuration, but it is not a cost that shows up in an estimate written from the ground.
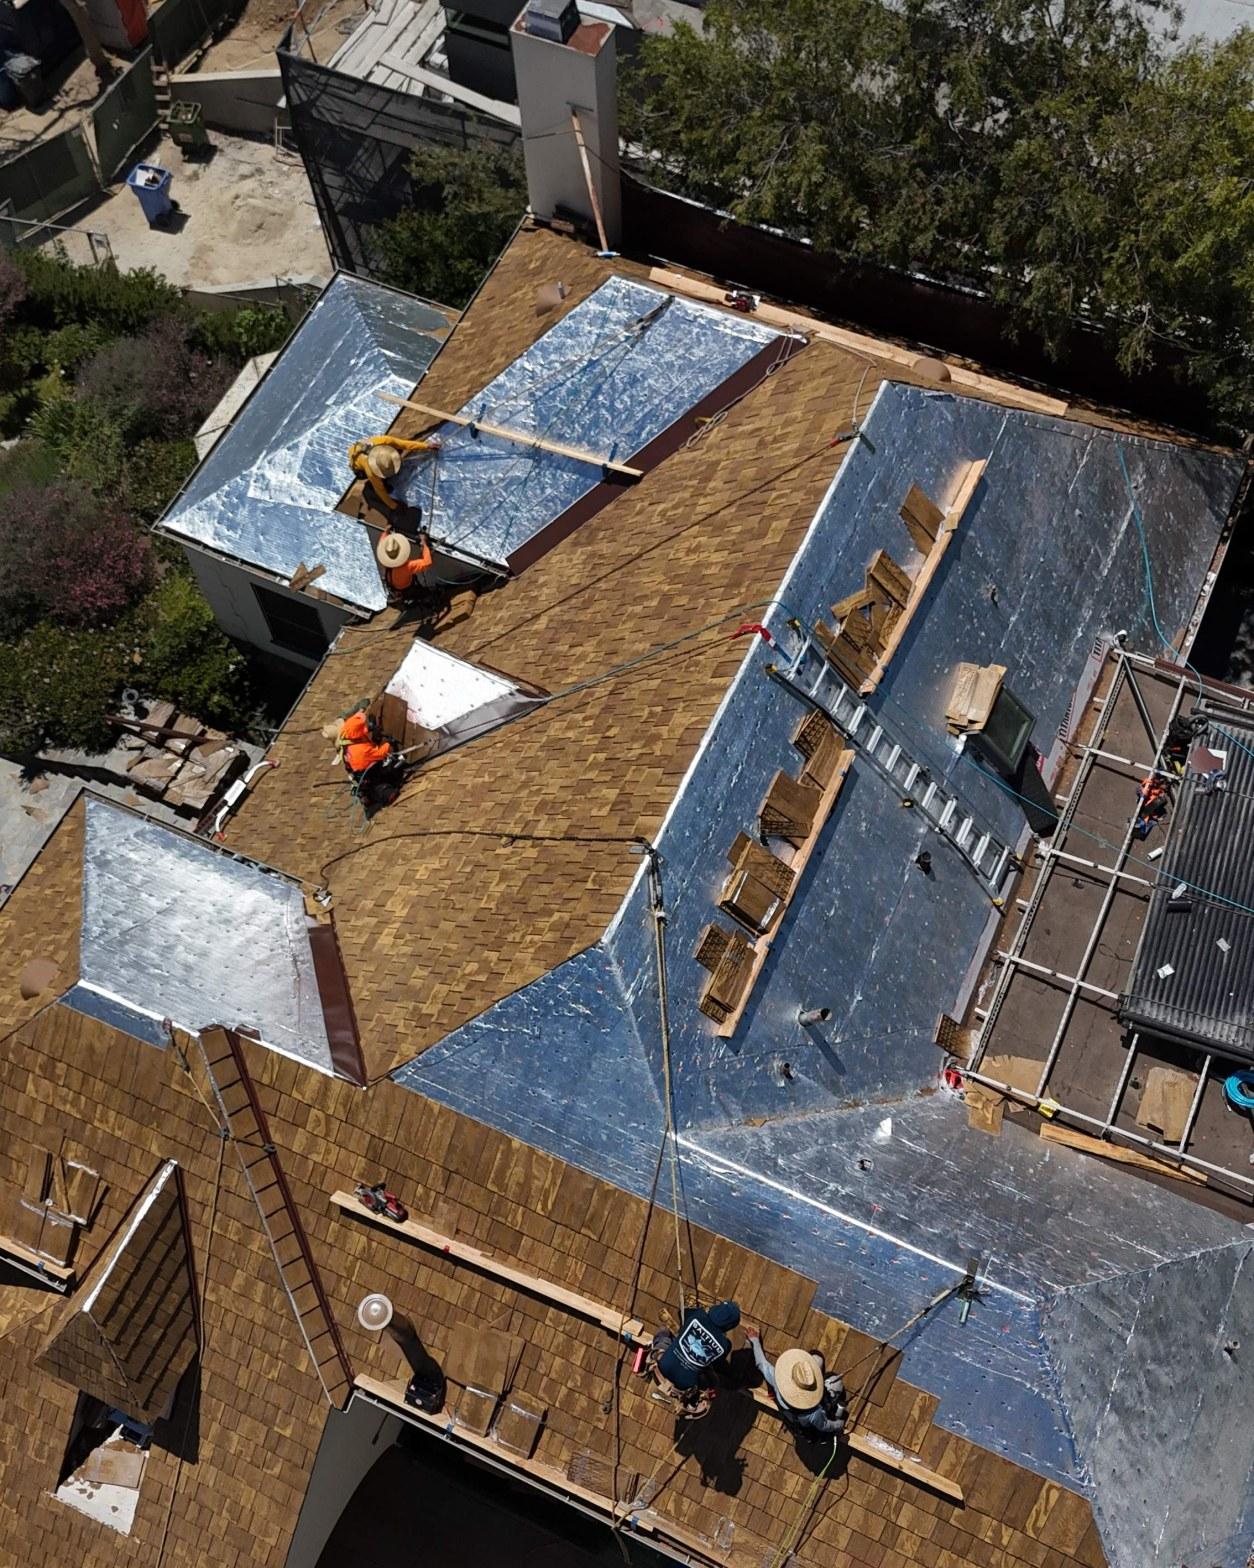
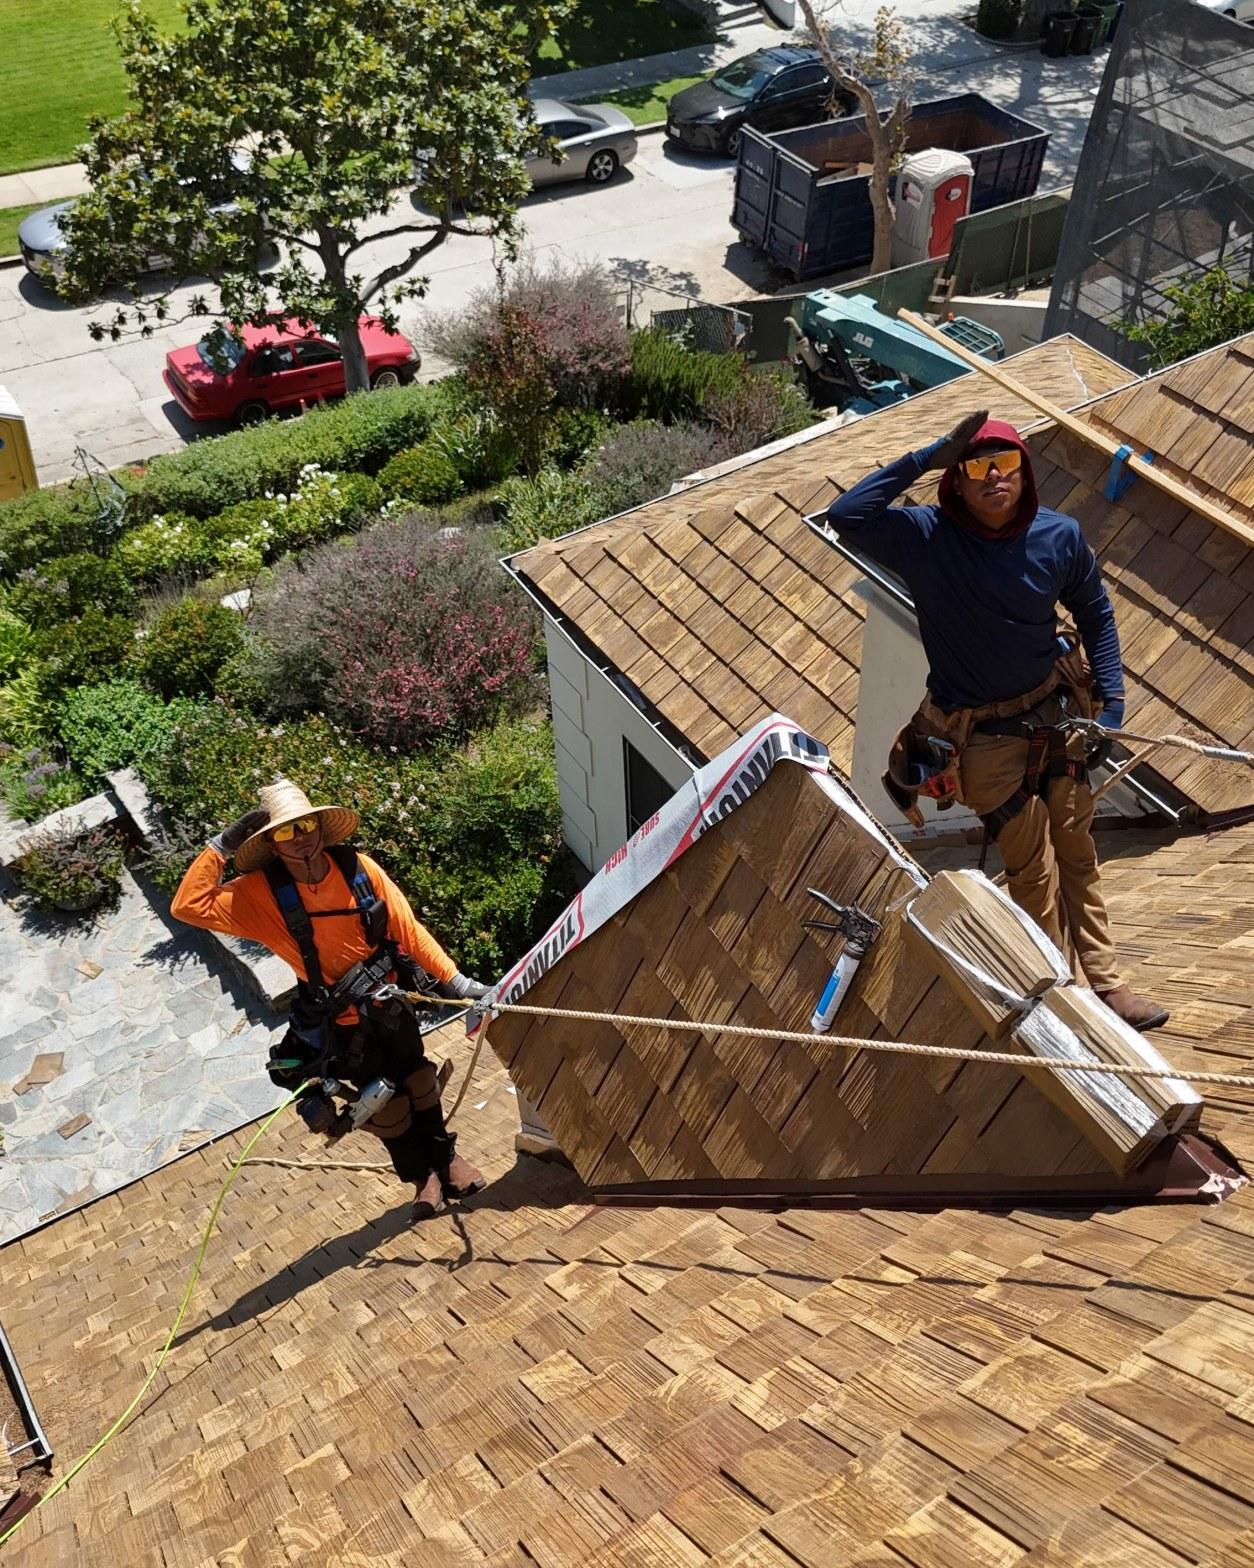
The low-slope sections on this house had used a combination of original sheathing and what appeared to be skip sheathing in some zones, which is correct for ventilated shake applications but not adequate as a substrate for a membrane system. New plywood had to go down first, properly nailed to the framing below, before the foil-faced underlayment and later the modified bitumen cap sheet could be applied. As seen in the aerial photograph taken during this phase, the crew was working both sections of the roof simultaneously: new plywood going down on the flat zone while the steep slopes were still being prepped for underlayment.
In our experience on re-roofs of this era and construction type, the transition zone between the steep framing and the flat framing is where the deck tends to show the most deterioration, because that edge catches water from above and collects debris from the shakes. It is worth probing carefully rather than assuming the substrate is uniform across the whole area.
Steep Slopes: Why Underlayment Comes Before the Shakes
On a steep, multi-plane roof with as many hip and valley intersections as this one, the underlayment is not a secondary layer. It is the primary waterproofing system. The wood shakes above it shed the bulk of the water and provide the aesthetic, but every intersection point, every valley, every dormer cheek, is a place where water can find a path through the shake layer and must be stopped by what is beneath it.
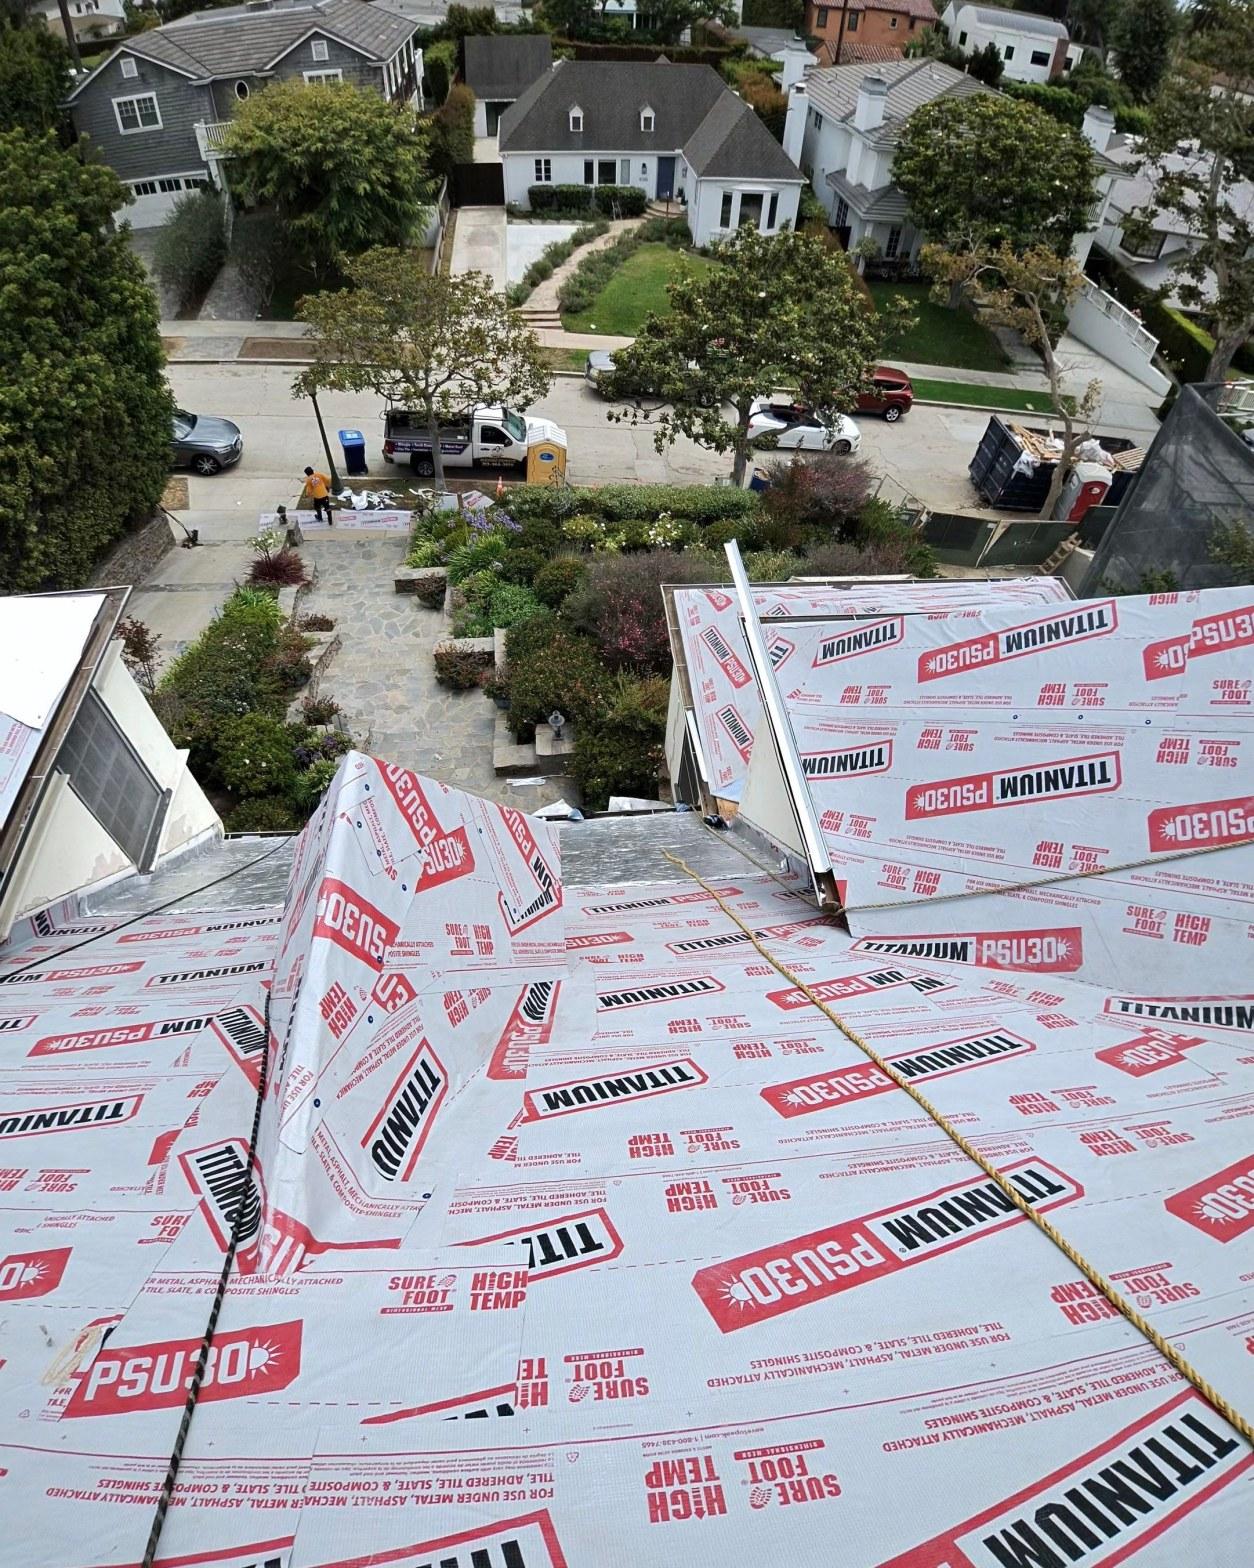
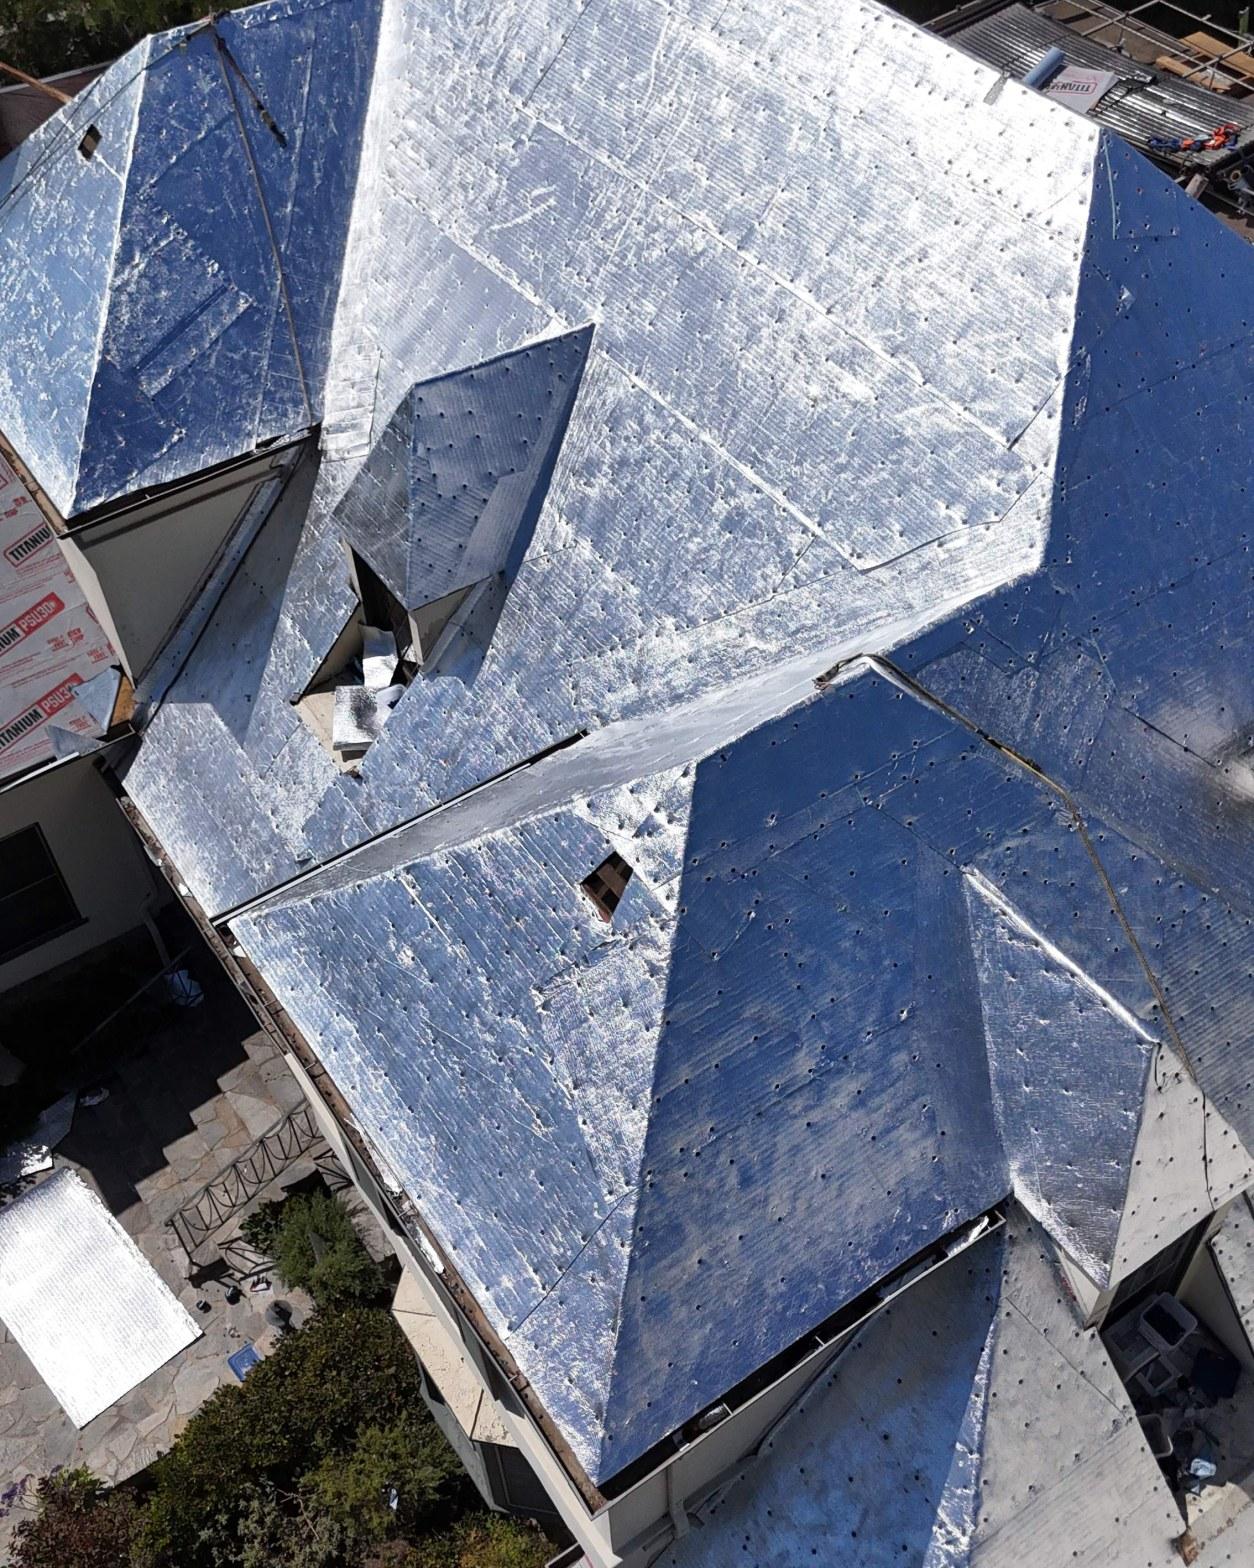
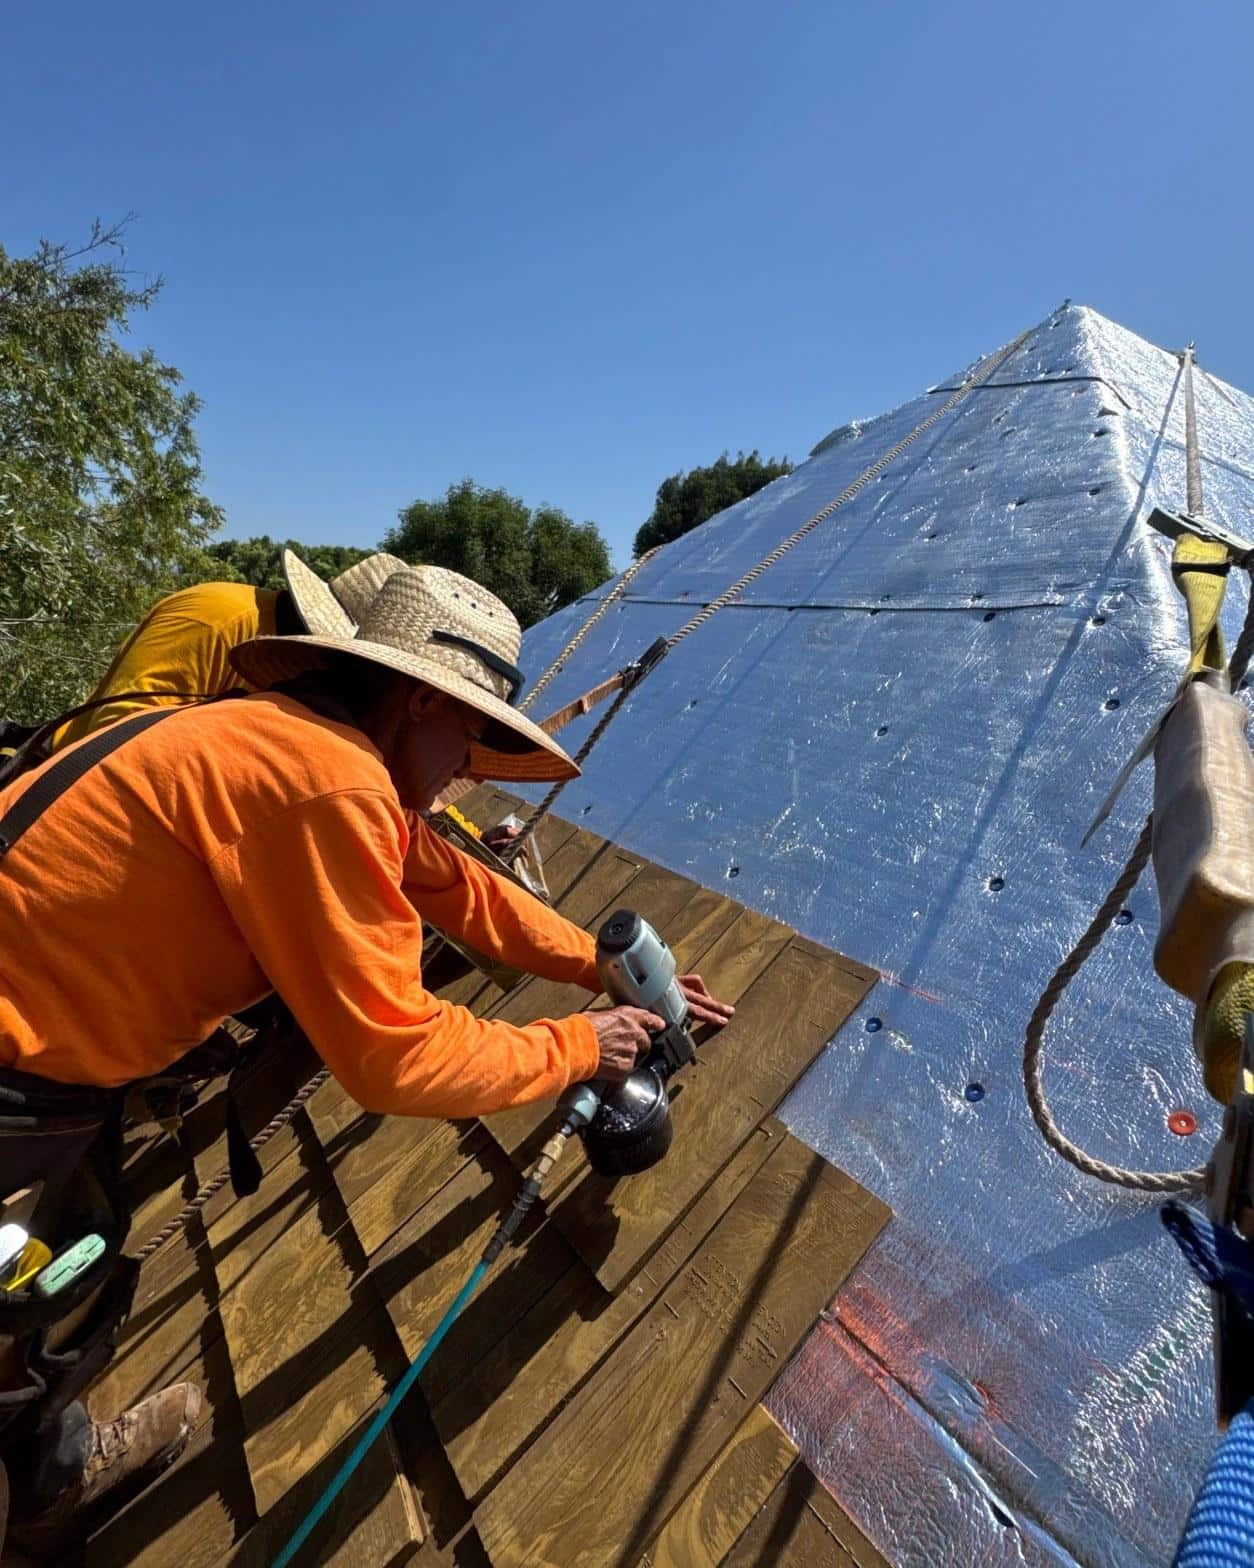
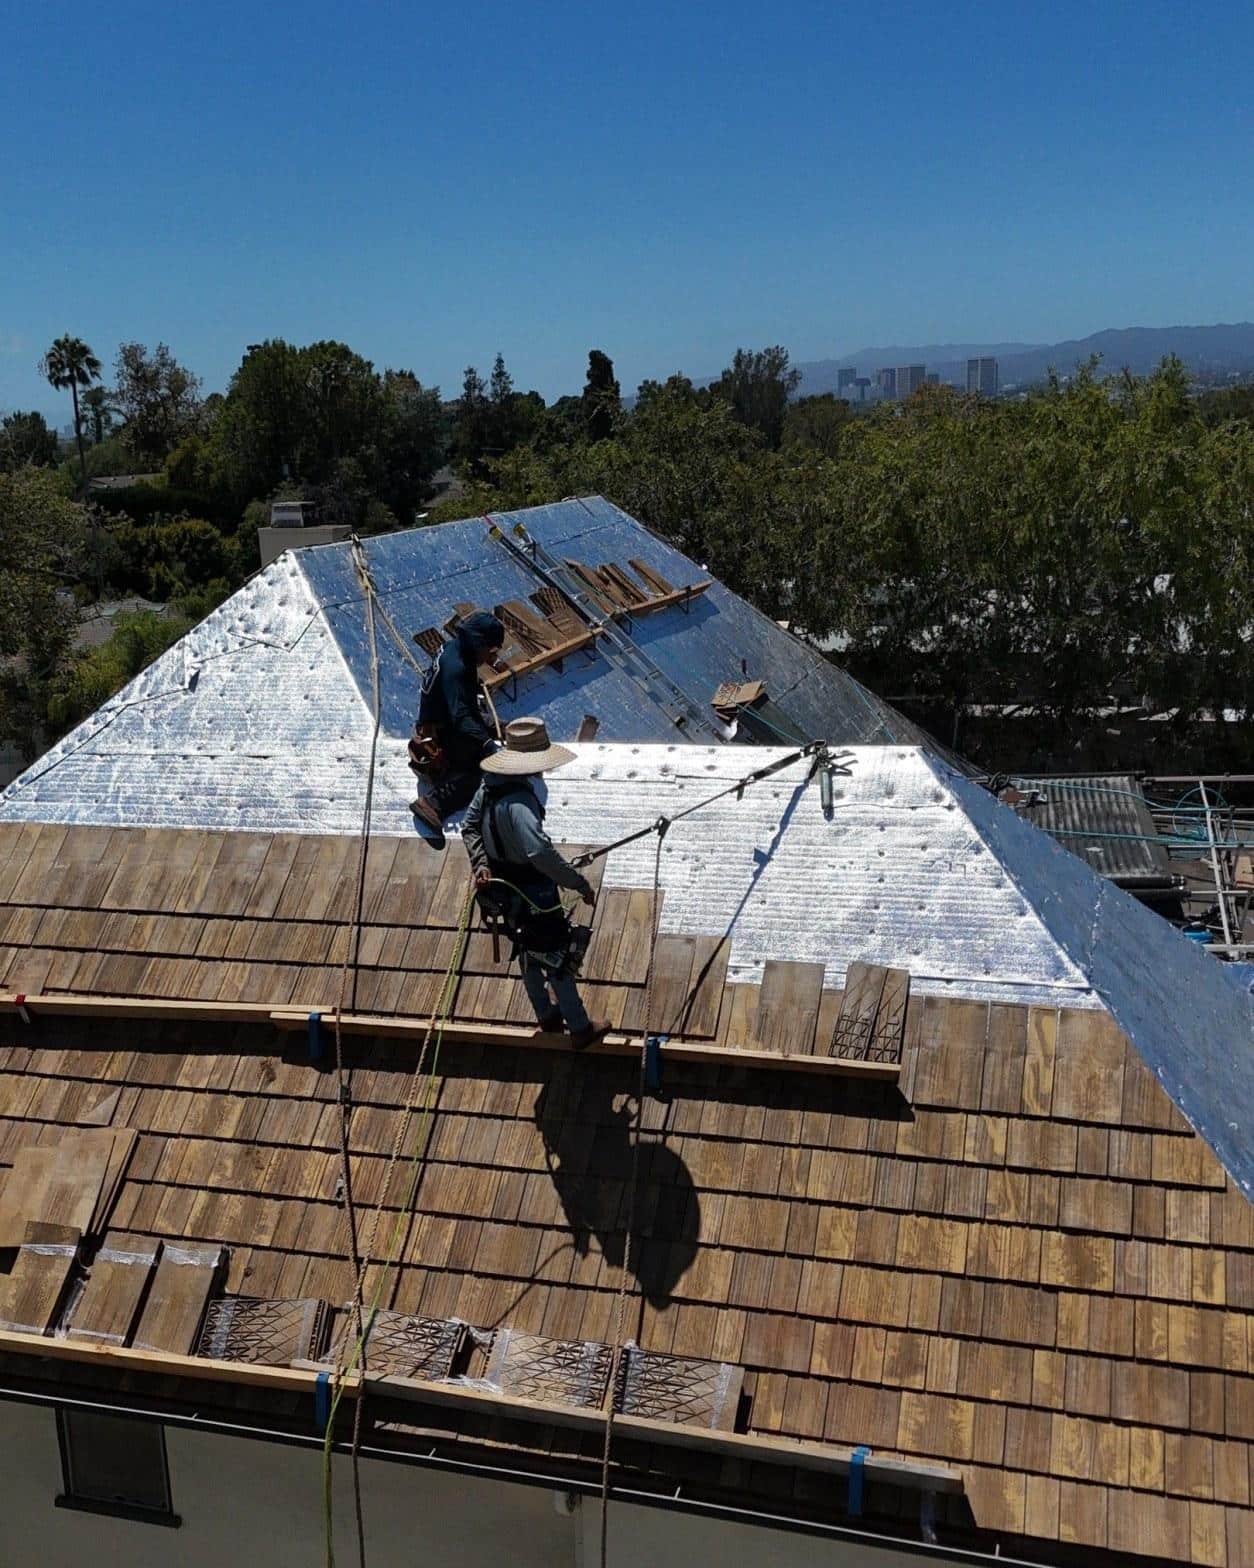
The product specified for the steep slopes on this job was Titanium PSU30, a self-adhered synthetic underlayment rated for high-temperature applications. Reflective and high-performance roof underlayments have become increasingly common in Southern California precisely because attic temperatures in West Los Angeles regularly exceed 140 degrees Fahrenheit on summer afternoons, and standard felt underlayment can degrade significantly under those conditions. The self-adhered format means the membrane bonds directly to the deck rather than relying purely on mechanical fasteners, which matters at hips and valleys where the geometry makes full mechanical attachment difficult.
The PSU30 was run continuously across every slope change, lapped through the valleys, and carried up behind the dormer cheeks and chimney bases before the shakes went on. That sequencing is deliberate: each transition gets its own layer of waterproofing before the outer material covers it. A valley that is flashed only with the shake layout, without a continuous underlayment beneath, is a valley that will eventually leak regardless of how well the shakes are cut.
Low Slopes: Why Wood Shakes Are Not an Option There
Wood shakes require a minimum roof pitch to drain properly. On sections that fall below roughly 4-in-12, gravity alone does not shed water fast enough, and shakes will absorb and retain moisture, failing prematurely and creating leak pathways. The low-slope and flat sections at the rear of this house fall well below that threshold, which is why those zones received a completely different system.
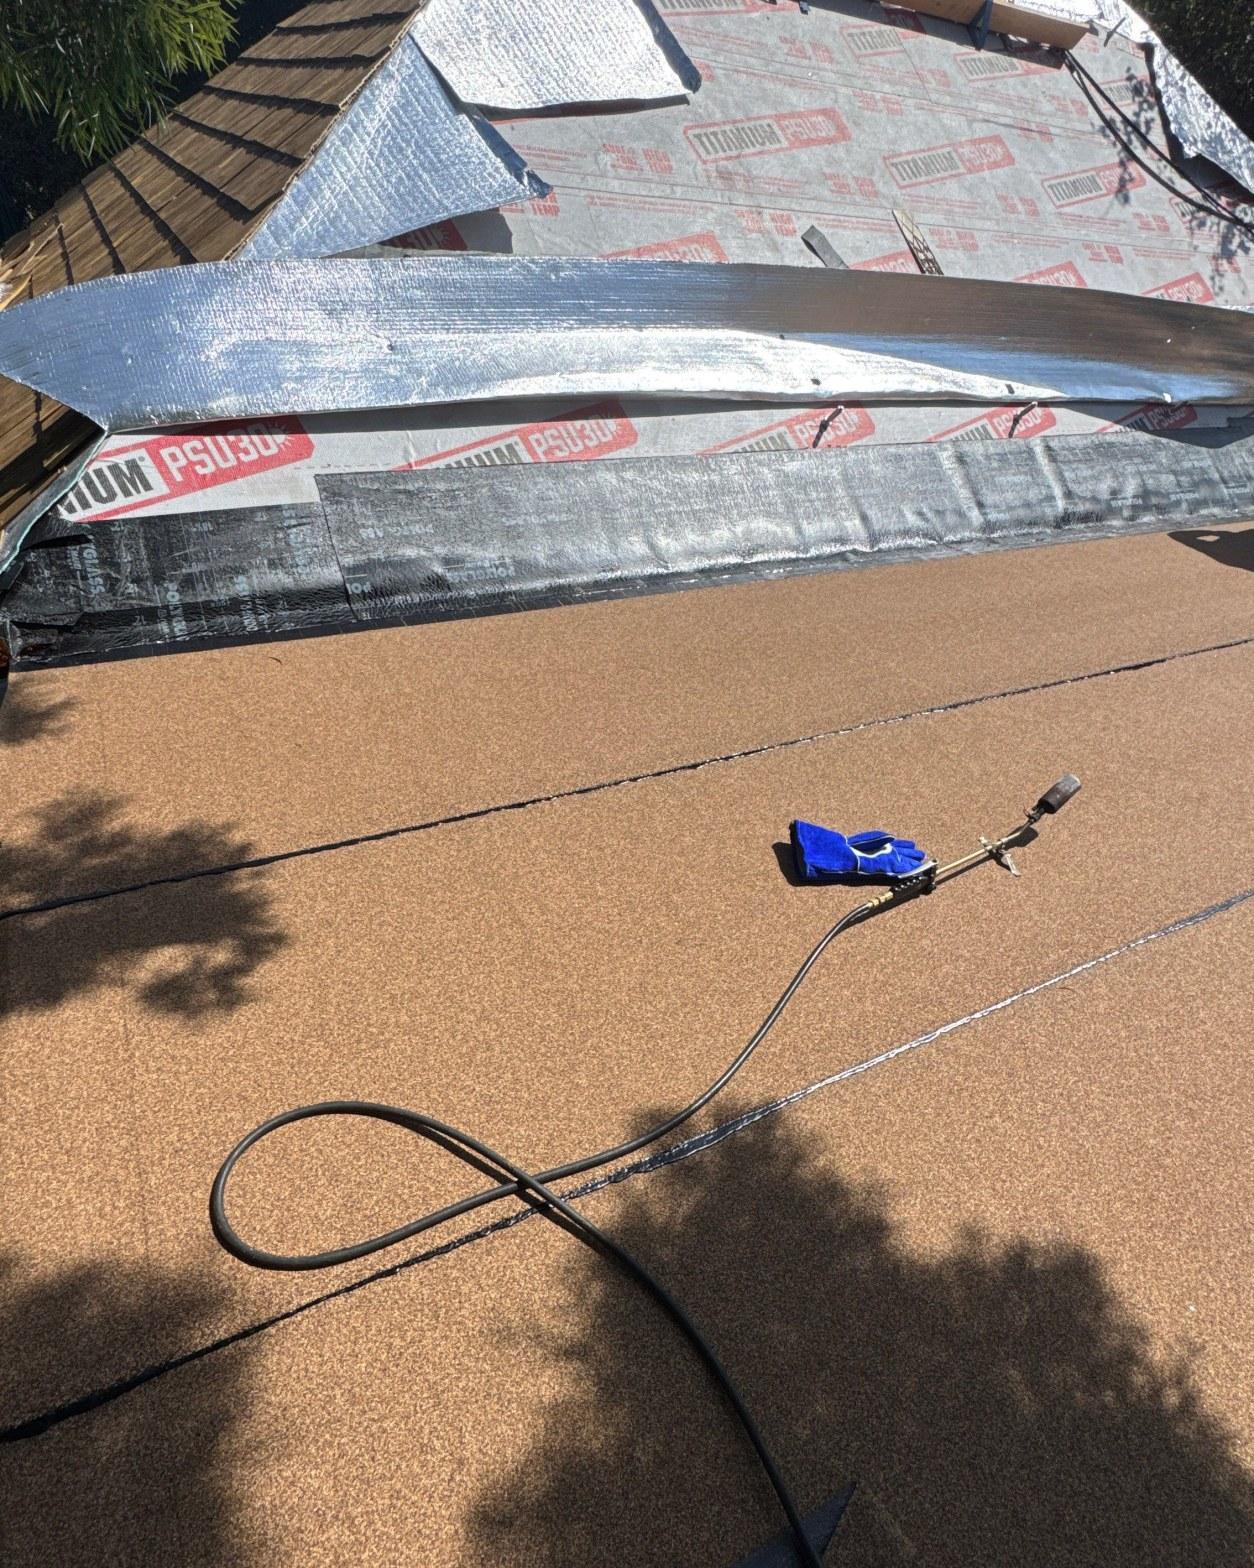
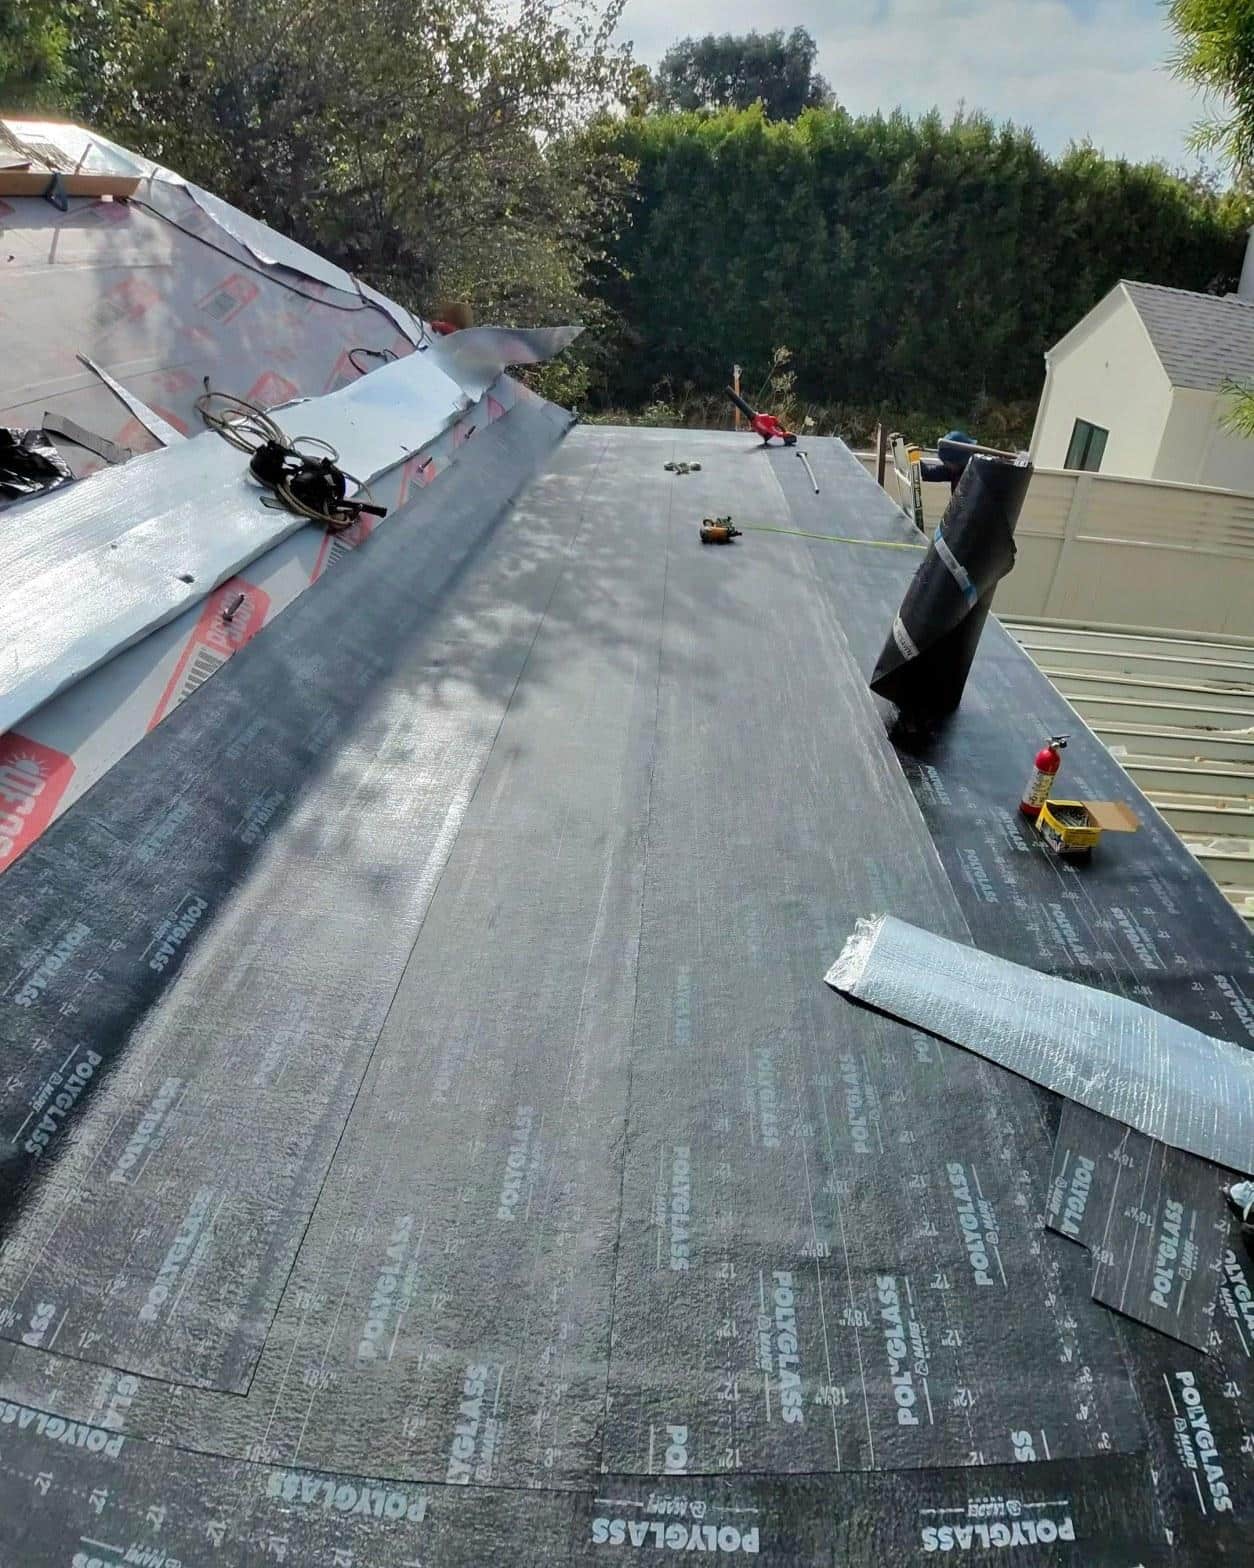
The system used here was Polyglass torch-applied modified bitumen, a two-layer membrane assembly where a base sheet is mechanically fastened and a granulated cap sheet is then torched down with an open-flame propane applicator. The torch application creates a full, seamless bond between the cap sheet and the base below it. That is the essential difference between a membrane system and a mechanically fastened material: there are no laps or gaps that water can probe. The granulated surface of the finished cap sheet is also more durable underfoot than a smooth-surface membrane, which matters on sections that may be accessed for HVAC service or gutter cleaning.
The low-slope work on this project proceeded after the new plywood decking was confirmed solid, so the membrane had a clean, stable substrate to bond to. The foil-faced underlayment visible in the earlier construction photos served as the base course on those sections before the cap sheet went down.
The Transitions and the Metal: Where Roofs Actually Leak
The place where two different roof systems meet, or where a roof meets a vertical surface such as a stucco wall, chimney, or dormer cheek, is where the overwhelming majority of residential roof leaks originate. Material transitions are not gaps in the system if they are detailed correctly, but they require sheet-metal work that is cut, bent, and fitted to the actual geometry of that specific building.
On this house, there are at least 4 distinct categories of metal flashing detail: step flashing along the dormer sidewalls where shakes meet stucco, counterflashing at the two chimneys, apron flashing at the dormer base, and transition flashing along the edges where the steep-slope shake system meets the low-slope membrane. Each of those is a different cut and a different sequence. The metal goes in after the underlayment and before the finish material, so that the flashing is lapped under the shake course above and over the membrane below, creating a continuous water path outward rather than inward.
According to the California Contractors State License Board roofing guidelines, proper flashing installation is among the most commonly cited deficiencies in residential roofing complaints. Getting the metal right on a roof this complex is more labor-intensive than the shake installation itself, hour for hour, because every piece is custom-cut to fit the actual angle it lands on. This is work that does not photograph as dramatically as fresh shakes across a large hip, but it is the detail that determines whether the finished roof actually performs.
The Finished Roof
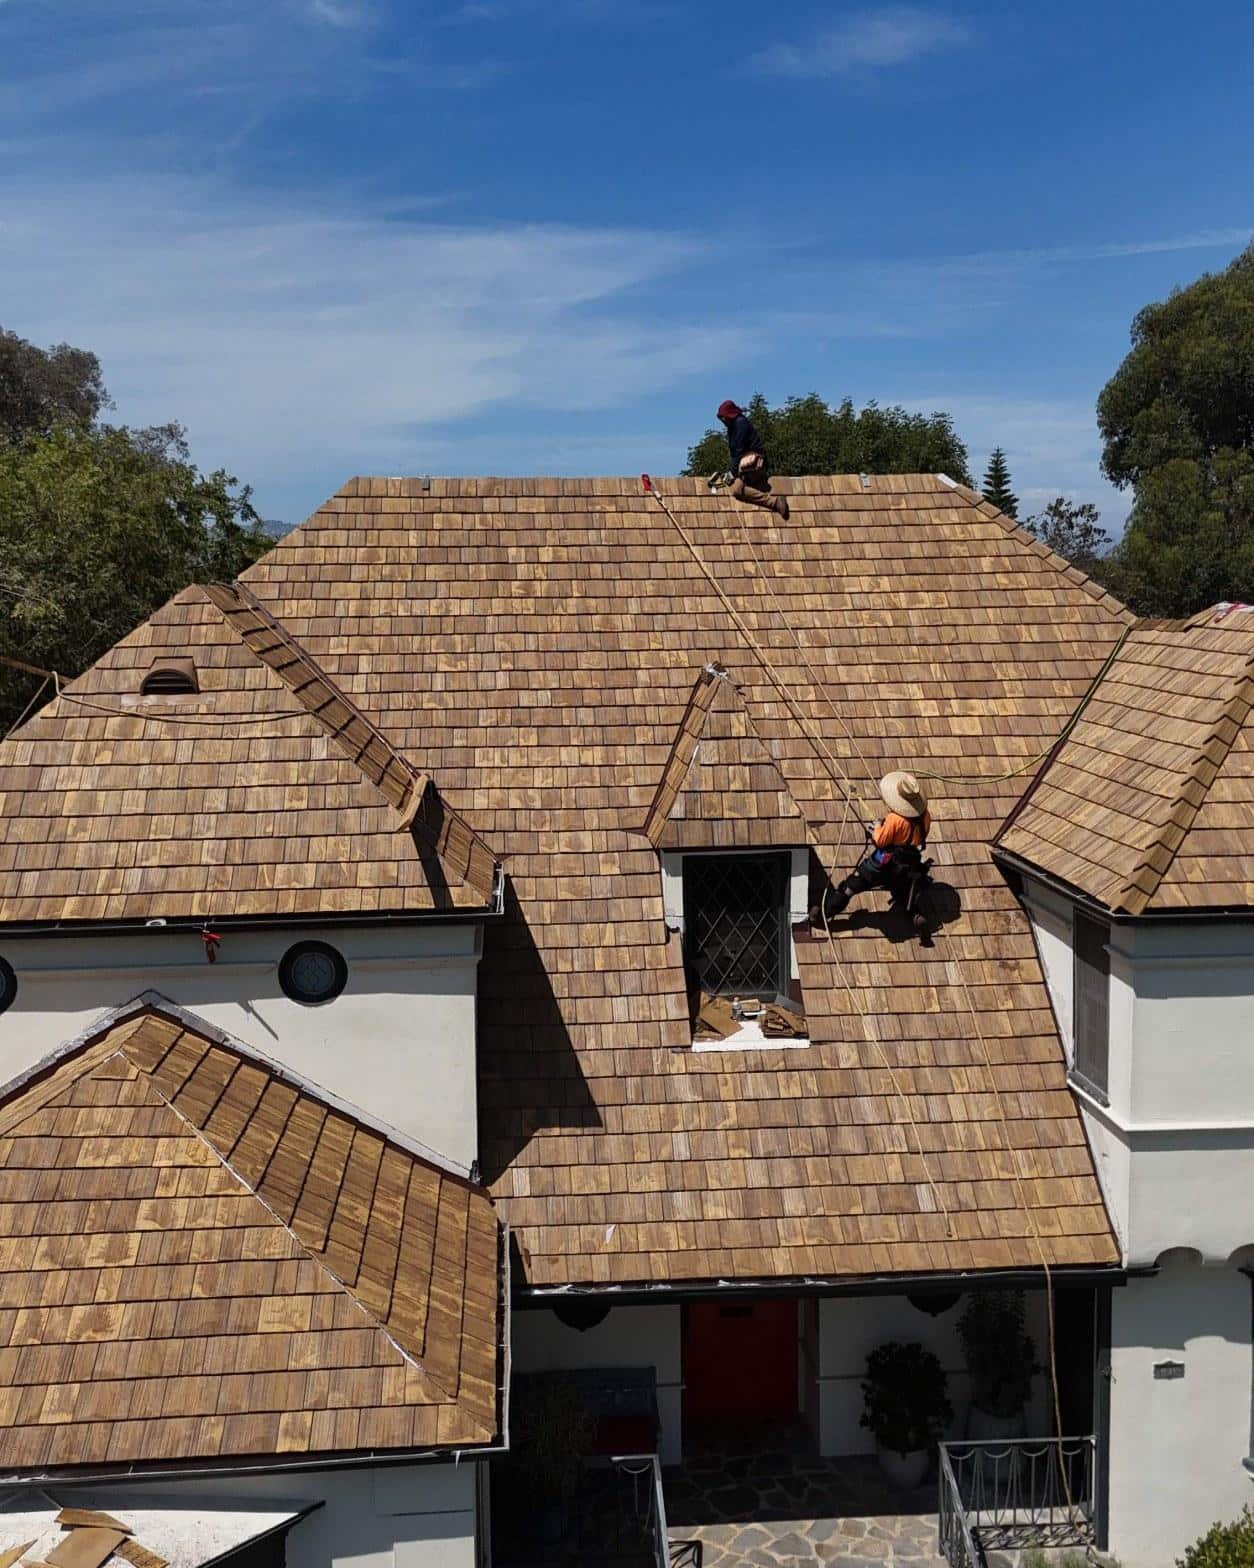
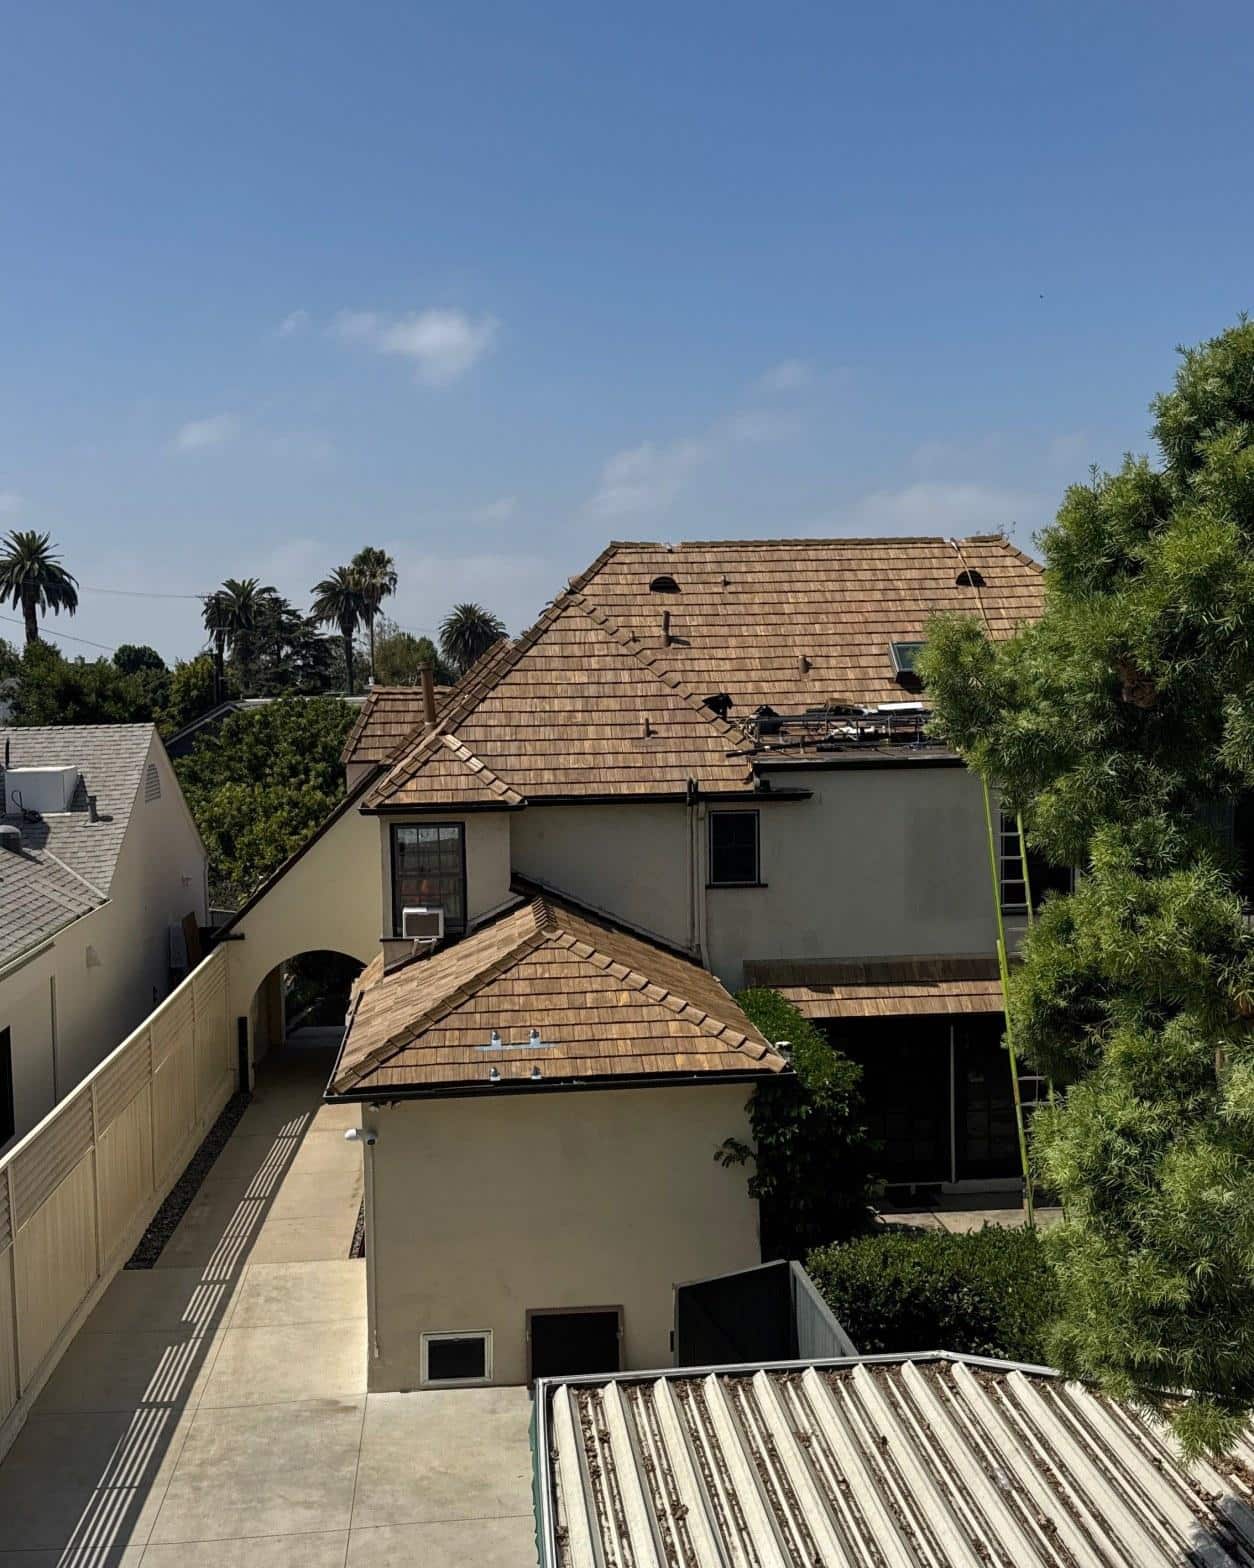
The completed roof on this Cheviot Hills home shows what a well-executed multi-system re-roof looks like from the air: continuous shake coverage across all steep surfaces, clean hip and valley lines, and a low-slope membrane zone at the rear that integrates with the steep-slope drainage rather than competing with it. The new shakes carry the warm honey-brown tone of fresh-milled material, which will weather gradually toward the silver-grey the original roof had reached. That weathering process on a properly maintained wood shake roof is measured in decades, not years.
Hollywood Contractor Corp is licensed by the California Contractors State License Board (CSLB), license number 1092628, and carried out this project under permit. The crew worked through summer 2026, navigating the tight site conditions of an established Cheviot Hills neighborhood where properties are closely spaced and debris management on a job this size requires constant attention to adjacent structures and landscaping.
If your home has a similar configuration, steep slopes meeting flat or low-slope sections, multiple dormers, chimneys, or any place where two different roof planes come together at an edge, the cost and timeline of replacement is driven far more by that geometry than by the total square footage of the roof. Contact Hollywood Contractor Corp to schedule a site evaluation and discuss what a project like this involves for your specific building.
Gallery
Frequently Asked Questions
Why does a roof with both steep slopes and a flat section cost more to replace?
A roof like this one requires two completely different waterproofing systems, wood shakes with self-adhered underlayment on the steep slopes and torch-applied modified bitumen on the flat sections, and those systems have to be integrated with custom sheet-metal flashing wherever they meet. Each system has its own material costs, its own installation sequence, and its own permit considerations. The total cost reflects all three factors, not just the square footage.
How do I know if my wood shake roof has reached the end of its life?
The clearest visual sign is color: a shake roof that has weathered from its original warm brown to a flat, uniform grey has lost most of its surface oils and is nearing the end of its serviceable life. You may also notice shakes that are split, cupped, or missing entirely, and moss or debris accumulating in the valleys. An inspection from inside the attic can confirm whether the sheathing beneath has also been affected before you commit to a full replacement scope.
Can you put wood shakes on a flat or low-slope roof section?
No. Wood shakes depend on gravity and airflow to drain, and they require a minimum roof pitch to perform correctly. On sections that fall below roughly 4-in-12, shakes absorb and retain water rather than shedding it, which leads to premature failure and leaks. Low-slope and flat sections require a membrane system such as torch-applied modified bitumen, which creates a continuous, bonded waterproof layer rather than relying on drainage.
What is Titanium PSU30 underlayment and why is it used under wood shakes in California?
Titanium PSU30 is a self-adhered synthetic underlayment rated for high-temperature applications. It bonds directly to the roof deck rather than relying only on mechanical fasteners, which makes it well-suited to valleys, hips, and other transition points where full mechanical attachment is difficult. In Southern California, attic temperatures can exceed 140 degrees Fahrenheit in summer, and standard felt underlayments can degrade under those conditions, so a high-temperature-rated product is the more durable choice.
Do I need a permit to replace a roof in Los Angeles?
Yes. A full roof replacement in Los Angeles requires a building permit, and the work must comply with California's Title 24 building energy standards as well as local fire and structural codes. Working under permit means the installation is inspected and documented, which protects you as the homeowner if you sell the property or make an insurance claim later.
Why does roof flashing matter so much on a complex roof like this one?
Flashing is the sheet metal that seals every place where the roof meets a vertical surface, such as a chimney, dormer wall, or stucco parapet, and every place where two different roof sections meet. These transition points are where the vast majority of residential roof leaks actually start, not in the middle of a field of shakes or membrane. On a roof with multiple dormers, two chimneys, and a steep-to-flat transition, there are many such edges, and each one requires metal that is custom-cut and lapped in the correct sequence so water always drains outward.